

OpenEmail is in early access, so talk to us to install it.
1
Copy your MCP address
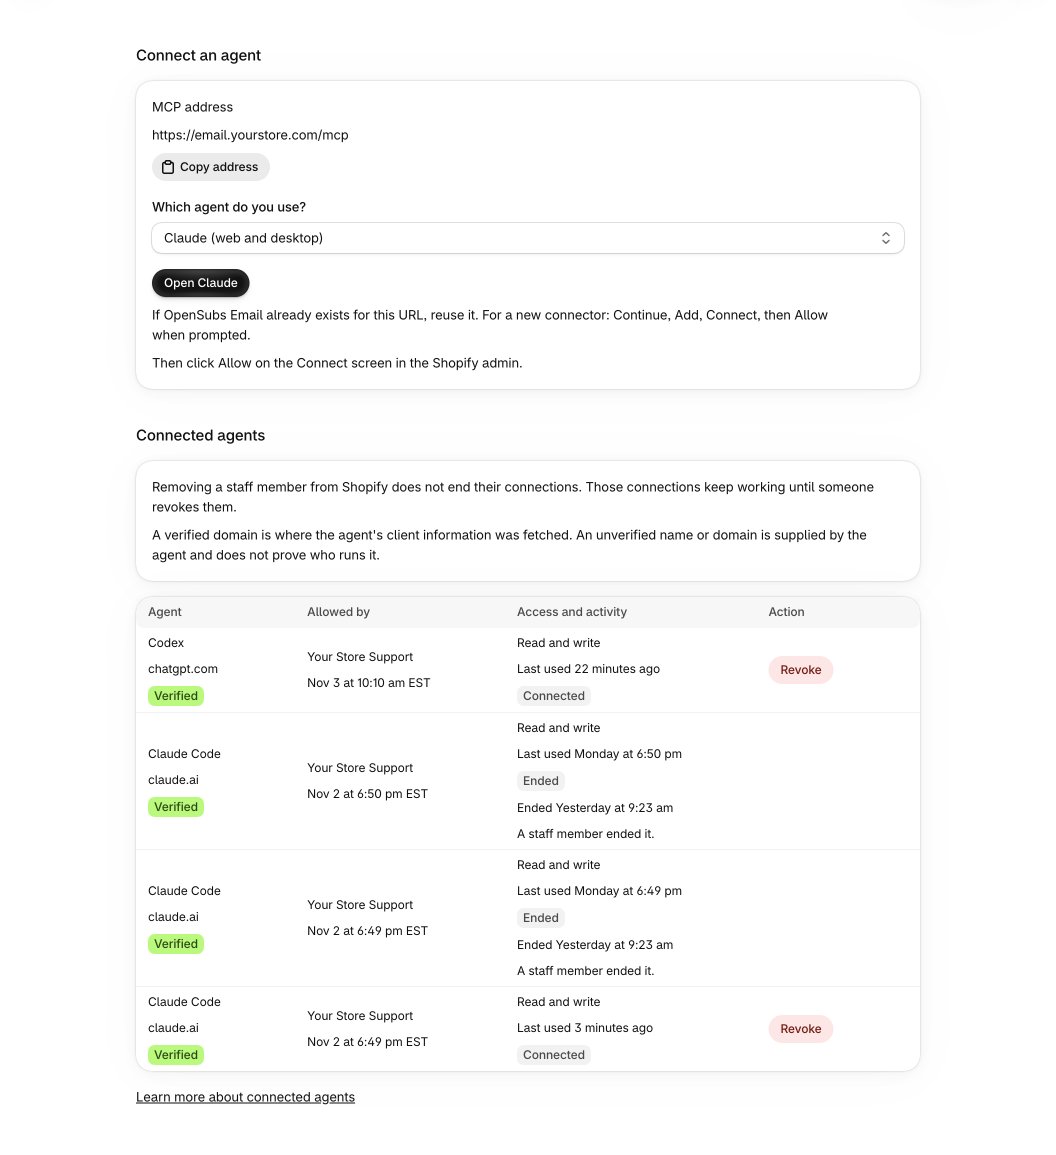
- In the OpenEmail app in your Shopify admin, open Settings > Agents.
- Under Connect an agent, the MCP address is your hostname followed by
/mcp, for examplehttps://email.yourstore.com/mcp. Click Copy address. - Pick your client in Which agent do you use?. The page shows that client’s button or command with your address already filled in.
Checkpoint: you have your MCP address, and the page shows the steps for your client.
2
Add it to your AI
If your client already has a server or connector for this address, reuse it instead of adding a second one.
- Claude
- Claude Code
- ChatGPT
- Codex
- Cursor
- Other MCP clients
For claude.ai and the Claude desktop app, which share the same connectors.
- On Settings > Agents, choose Claude (web and desktop) and click Open Claude. Claude’s custom connector form opens with the name OpenSubs Email and your address filled in.
- Click Continue, Add, then Connect.
- Or add a custom connector yourself in Claude’s connector settings and paste your MCP address as its URL.
Checkpoint: your client opens a browser window to sign in.
3
Allow it in the Shopify admin
Every client ends on the Connect an agent screen in your Shopify admin. Sign in to Shopify if it asks. Check each part before you decide:
- The agent: its name and domain. Verified means OpenEmail read the name from a document published on that domain. Not verified means the agent supplied its own name, and nobody checked it.
- Where your browser goes back to: the address you return to after deciding. Continue only if you expect it.
- Access: reading data is always included. Allow changes to data lets the agent make changes too. Clear it to allow read access only.
- Your decision: who you’re signed in as. Activity records your name with whatever you decide.
Checkpoint: the screen says Access allowed, and your client shows the server as connected.
4
Check it works
- In a new chat, ask your agent: “Call get_status and tell me what you see.”
- It should answer with your install state, any holds on sending, and any warnings.
Checkpoint: your agent lists OpenEmail’s tools and
get_status answers. Adding the address alone isn’t a connection; this answer is.The connection request is open for 10 minutes. If it expires, or the screen says it was already answered, ask your agent to connect again.
Read or read and write
Each connection has one of two levels of access, chosen on the Connect screen.
Write access never includes approving. Anything that needs a staff member’s yes still needs it, in the Shopify admin. See What stays with you.
To change a connection’s access, connect it again and decide again on the Connect screen. A read-only agent that calls a write tool is refused.
Revoke access
- Open Settings > Agents. The Connected agents list shows each connection, who allowed it and when, its access, and when it was last used. Ended connections stay on the list.
- Click Revoke beside a connection and confirm with Revoke connection.
- To end every connection at once, click Revoke all and confirm with Revoke all connections.
What your agent can do
Every tool, grouped by job, and which need write access.
Prompts that work
Copy-paste prompts for the daily check, campaigns, flows and more.