

How an email is built
- HTML with Liquid. The same template language Shopify’s own notifications use. An email has a name, a subject, preview text and its HTML.
- Every save is a new version. A version never changes, so an approval or a sent message points at exactly what you saw. Archiving keeps every version; an archived email can’t be picked for a new campaign or flow step.
- Variables:
contact.first_name,contact.last_name,contact.email,shop.name,shop.url,shop.addressandunsubscribe_url. Flow emails also getcheckout, with its items, totals and link.
- Products come live from your Shopify catalog and are written into the email, so the approved version is exactly what goes out.
- The unsubscribe link and your shop address appear in every email. A design can place them, never leave them out. Links are rewritten to count clicks, and an open pixel is added while tracking is on and the contact hasn’t declined it.
- From Klaviyo: after a migration, your agent can turn a Klaviyo design into an email. Klaviyo-only tags are flagged as errors until it rewrites them in Liquid.
Images live in Shopify Files
When an email is saved, OpenEmail copies each of its images into your store’s Content > Files, and sent emails load them from Shopify’s CDN.- Use PNG, JPEG, WebP or GIF (animated too). Gmail and Outlook don’t show SVG, so an SVG or any other format blocks approval.
- Have an image only as a file? Upload it in Content > Files and give your agent its link.
- A campaign or flow can’t be approved until every image is copied. If someone deletes a copy in Files, approval is blocked until the email is saved again.
- The copies count toward your Shopify file storage. OpenEmail never deletes them.
Errors and warnings
- An error blocks approval until your agent saves a fixed version, for example an unknown variable or an unsupported image. Test emails still go.
- A warning is worth a look but doesn’t stop the email: HTML over 90 KB, a
<style>block (Gmail’s mobile webmail ignores it), or an image without alt text.
Your brand
Your agent keeps your brand so every email it writes matches your store: your logo, colors (background, text, accent, buttons), heading and body fonts, a few lines on how you write, your social links and footer text. It reads them from your website, and after a migration from your past Klaviyo emails. Changing the brand changes only emails written afterwards. There’s no brand screen; ask your agent.Ask your agent
1
Have your agent write the email
- Ask for the email in plain words. Your agent saves it and gives you a preview link.
Ask your agent
Checkpoint: the link opens the email in the Shopify admin.
2
Preview it
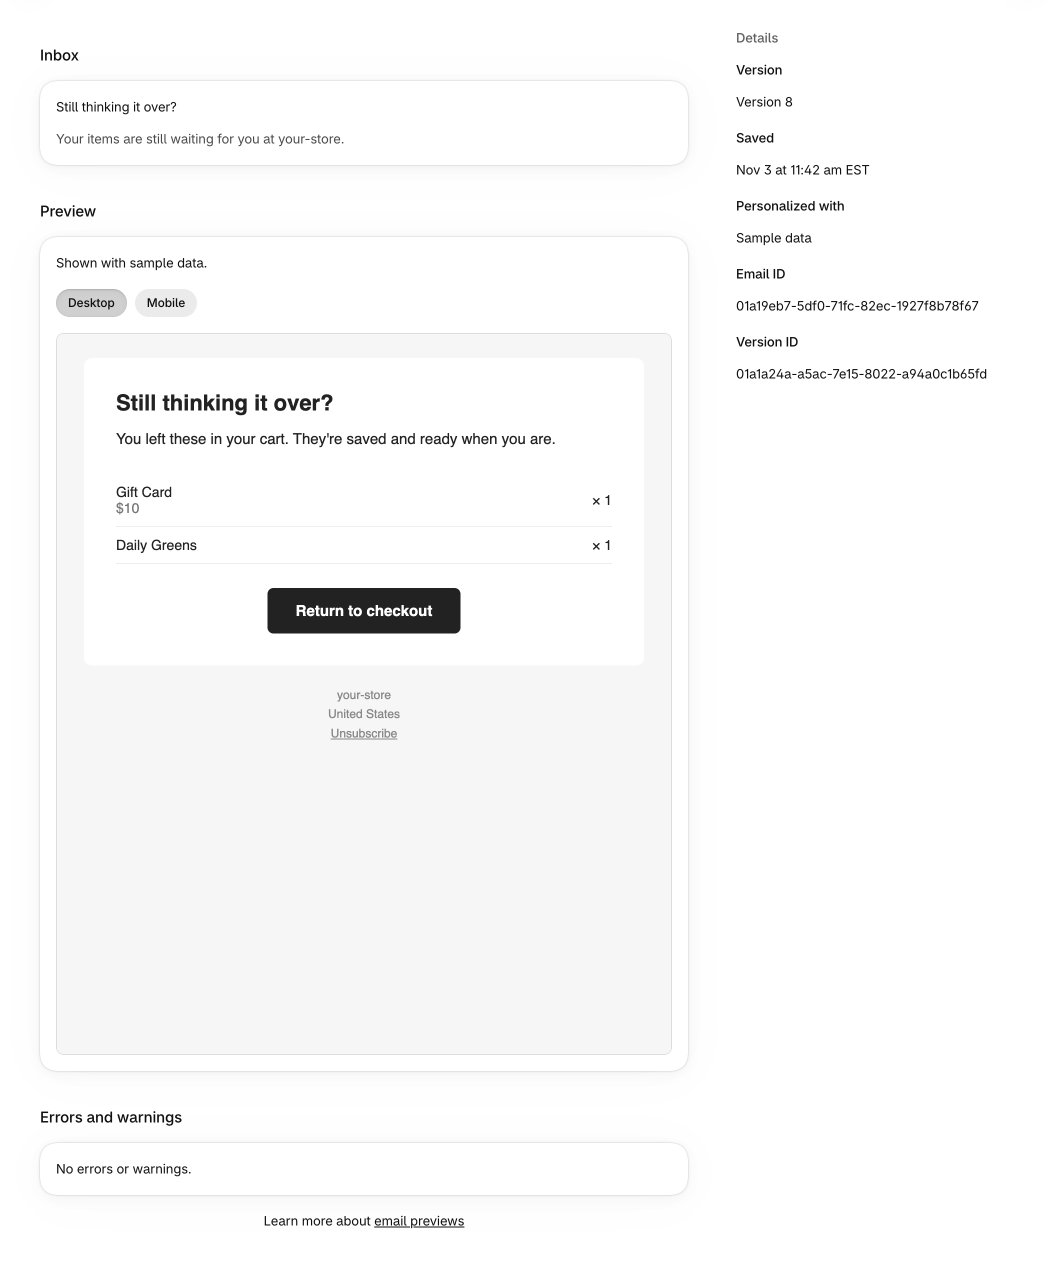
- Open the preview link, or Emails in the app nav. Choose Active or Archived, then select an email to open its newest version.
- The page shows the Inbox line (subject and preview text), the email itself (Desktop or Mobile), and its Errors and warnings.
- Details shows the version and whether it’s filled with Sample data or as one contact would get it. Pick an earlier version there to compare.
- Edit this email gives you a prompt to copy, naming this exact version, so your agent starts from what you’re looking at.
- Nothing on the page changes or sends the email. The frame runs no scripts, and its unsubscribe link is a sample that can’t unsubscribe anyone.
Checkpoint: Errors and warnings reads No errors or warnings., and the email looks right at both widths.
3
Add your test addresses
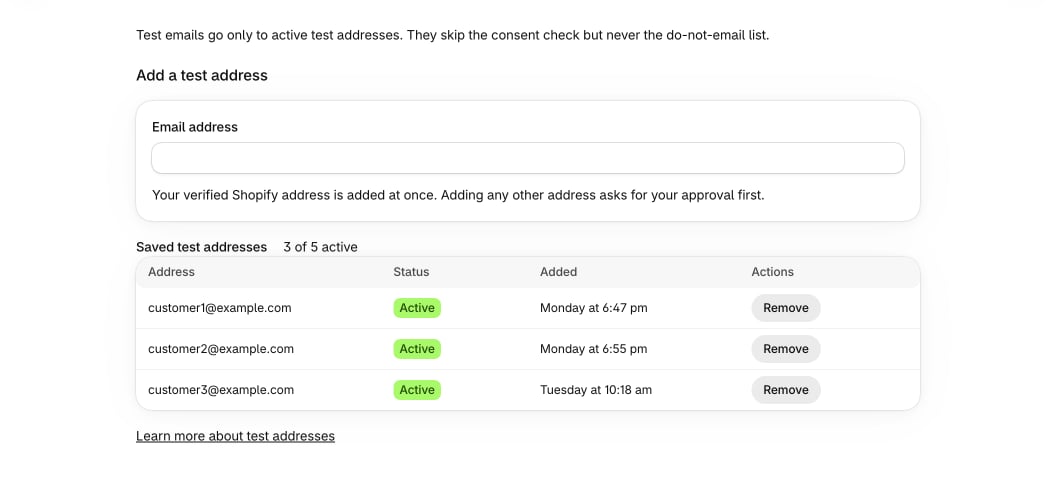
- Open Settings > Test addresses, enter an address and choose Add test address. You can have five active.
- Your own verified Shopify address becomes active at once, and the store owner’s is added when they first open the app. Any other address asks you to confirm it; that confirmation is your approval.
- An address your agent adds shows Waiting for approval until you approve it. Remove frees a slot.
Ask your agent
Checkpoint: the address is listed under Saved test addresses as Active.
4
Send a test
- Test sends go through your agent: to every active test address, or to the ones you name, with sample data or as a chosen contact would see it. The subject goes unchanged.
- Test emails skip the consent check and holds, but never the do-not-email list. At most 200 go out in any 24 hours.
- Their opens and clicks never count in your results, and their unsubscribe link leads to a page that says it’s a test.
Ask your agent
Checkpoint: the test is in your inbox, with images loaded and links working.
Before PostShiba approves your account, test emails reach only your PostShiba team’s own addresses; any other comes back as not approved yet. See Connect your sending domain.